This
article explores the process of running commands on EC2 instance remotely. AWS
Systems Manager is a Management Tool that enables you to gain operational
insights and take action on AWS resources safely and at scale. AWS Systems
Manager is an always free tier product. The EC2 instance you create in this
tutorial is free tier eligible.
So, let’s
begin with creating an EC2 instance first.
Step 1:
Create an EC2 Instance
The first
step is to create an EC2 instance that will be managed by AWS System Manager.
1. Login to
your AWS account. Select AWS EC2 service and click on Launch
Instance.

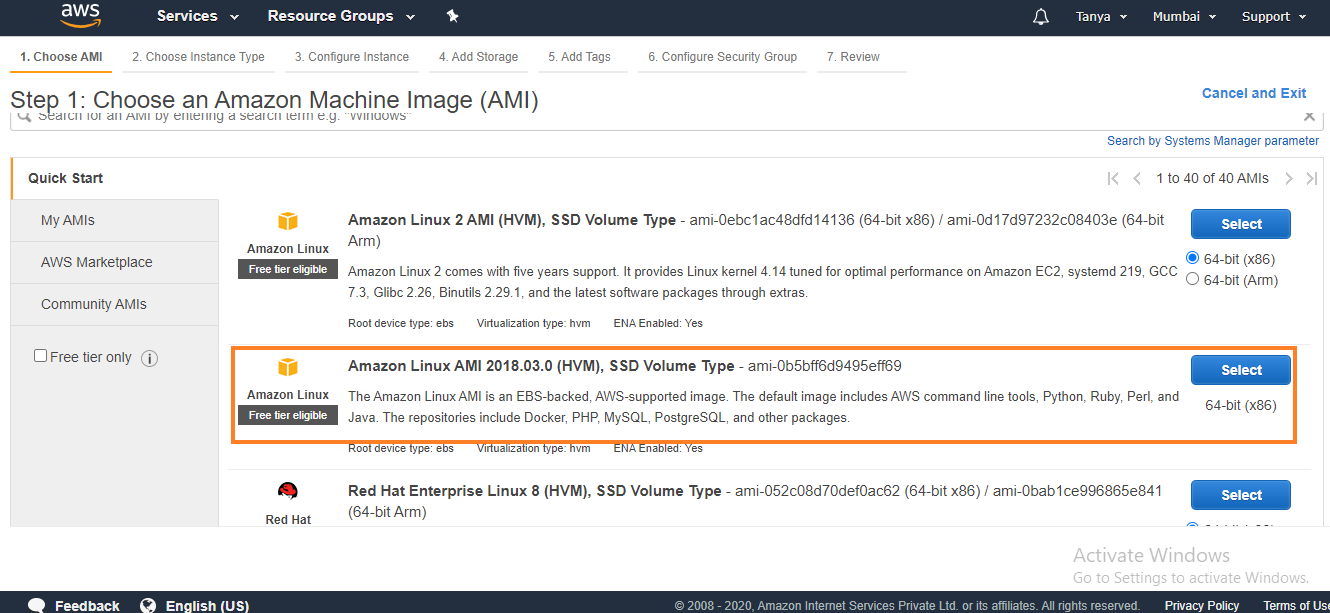
2. Select
the Amazon Machine Image(AMI). You have to select Amazon Linux base AMI dated
2017.09 or later which includes the Systems Manager Agent by default. ( We have
used the 2018.03 version here)
3. Now
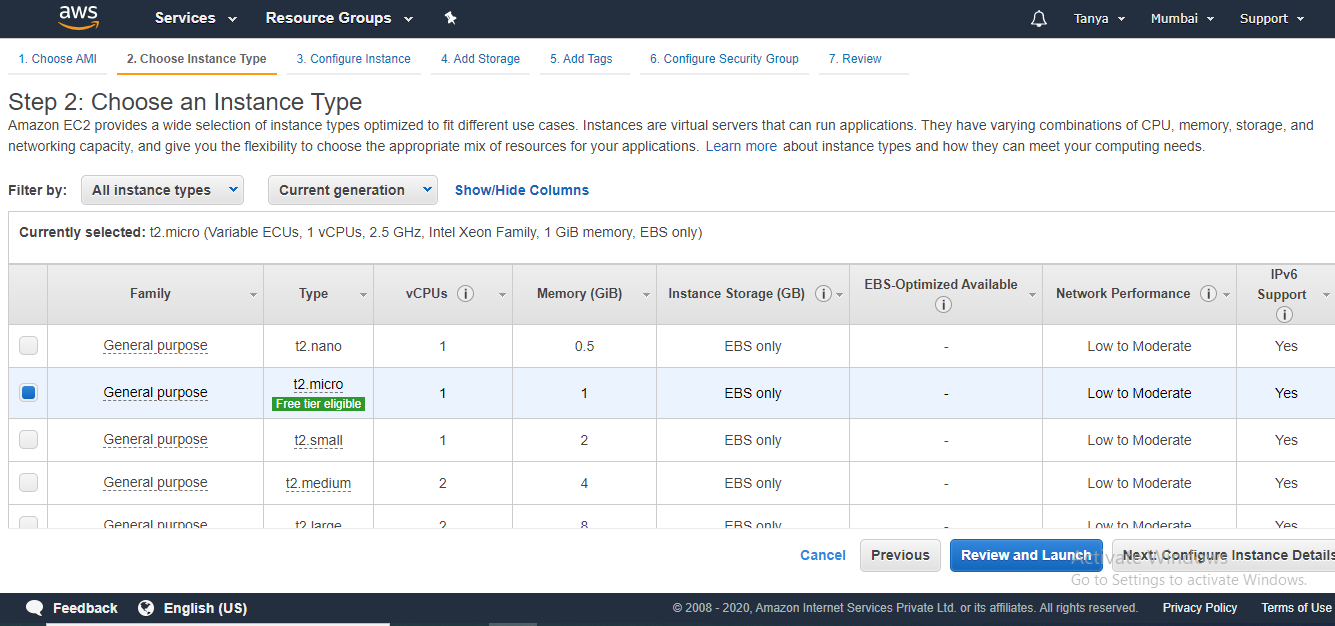
choose your instance type. To avoid any charges for this experiment, we can use
the instance type t2 micro which is available in the free tier. Click on Review
and Launch.
4. On the
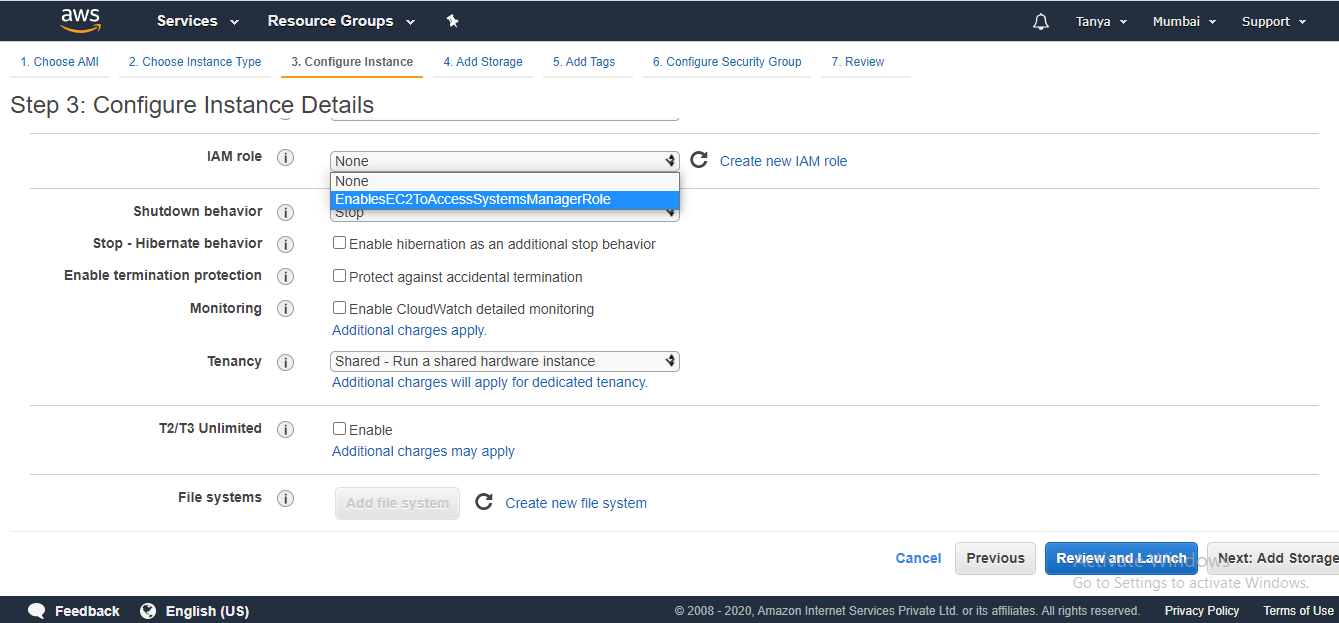
next page, In the IAM role dropdown choose the EnablesEC2ToAccessSystemsManagerRole role
you created earlier. Choose Review and Launch.
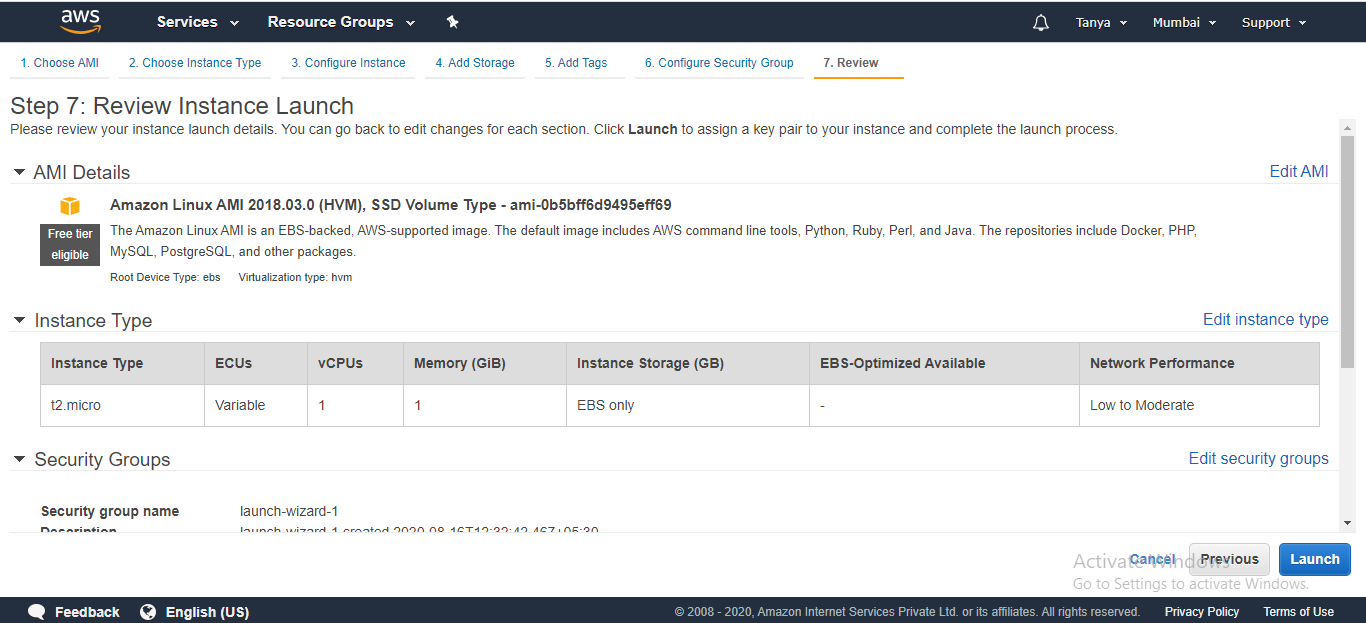
5. After
reviewing the details of your instance carefully, click on launch.
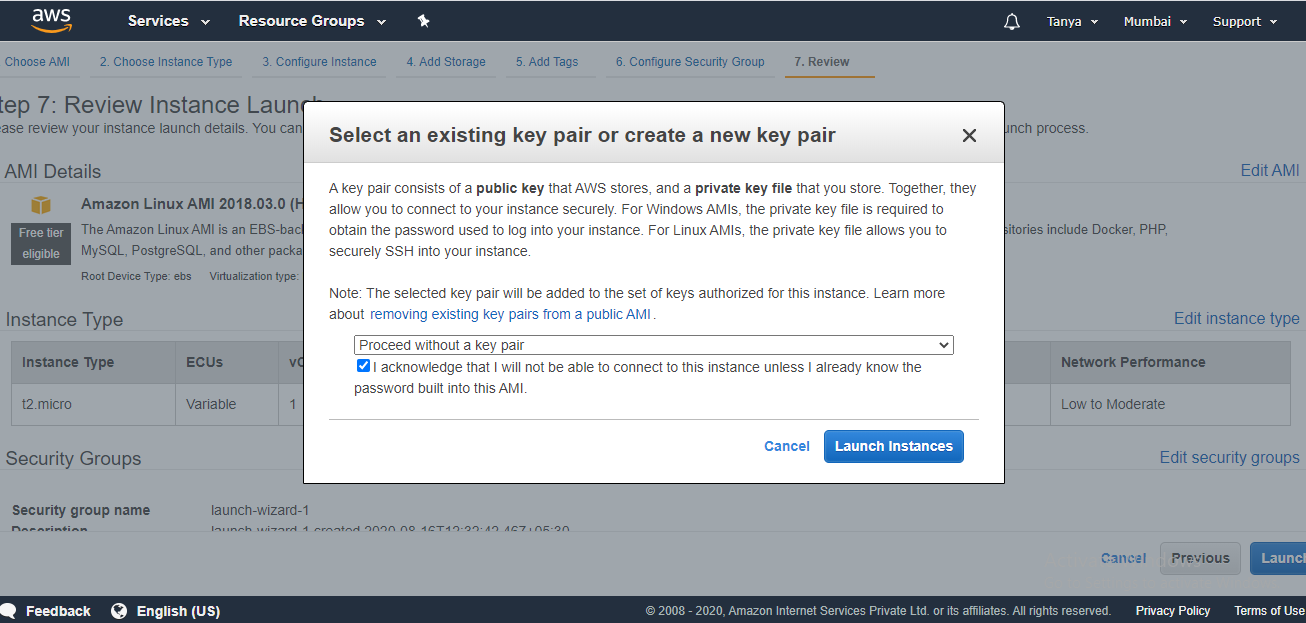
6. Next,
generally you have to add a key pair to your EC2 instance, but you will not
need a key-pair to use Systems Manager to remotely run commands. From the Choose
an existing pair dropdown choose To proceed without a key pair and
tick the checkbox stating: I acknowledge that. Next
select Launch Instance.
Step 2:
Create an Identity and Access Management (IAM) role
In order to
create a role that will use AWS System Manager, we will have to create one IAM
role configured for the same. For creating an IAM role follow these basic
steps.
1. Open the IAM console at https://console.aws.amazon.com/iam
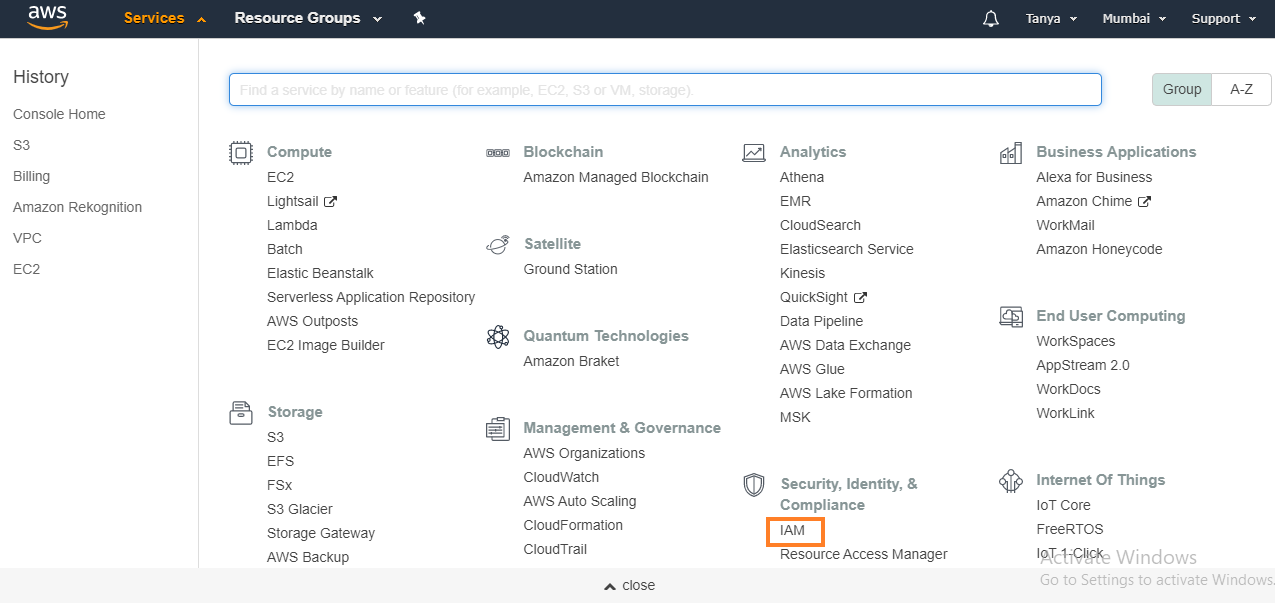
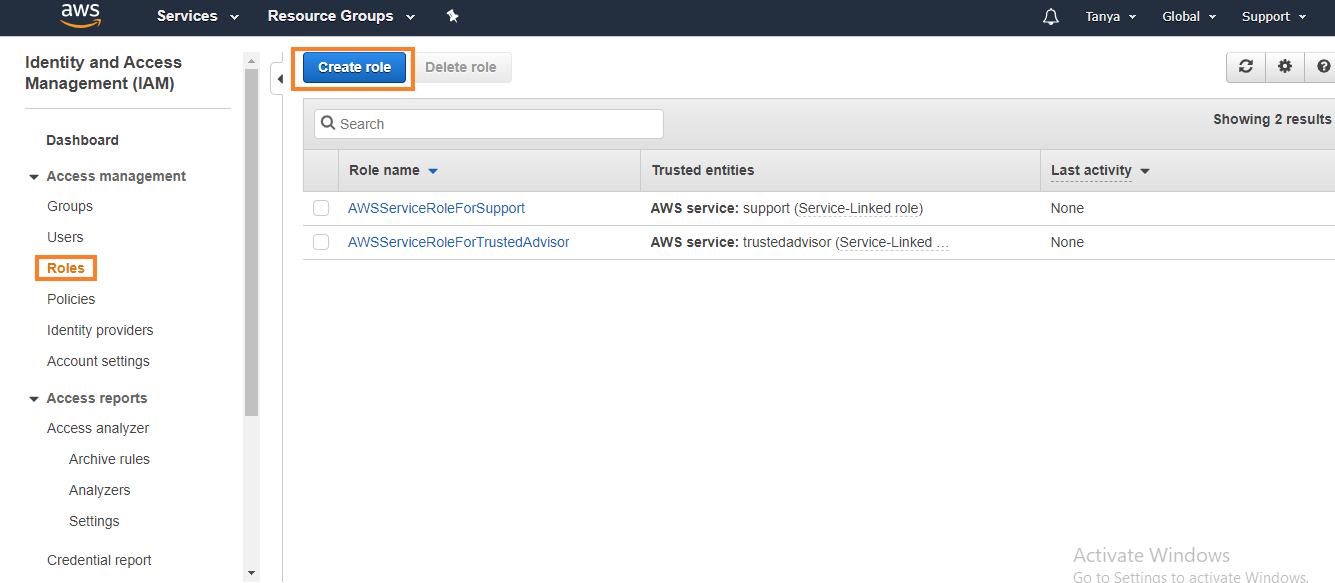
2. At the
left, click on Roles, and then click on Create Role.
3. On the next page, choose EC2, and then click on Next:
Permissions.

4. On the
next page, a search bar will appear in which type AmazonEC2RoleforSSM,
a policy list will appear click on the AmazonEC2RoleforSSM policy
and click on next: Tags

5. Tags are
optional, if you don’t want to add tags click on next. After this,
a review page will appear where you have to type in the role name and role
description. After reviewing click on create role.

Step 3:
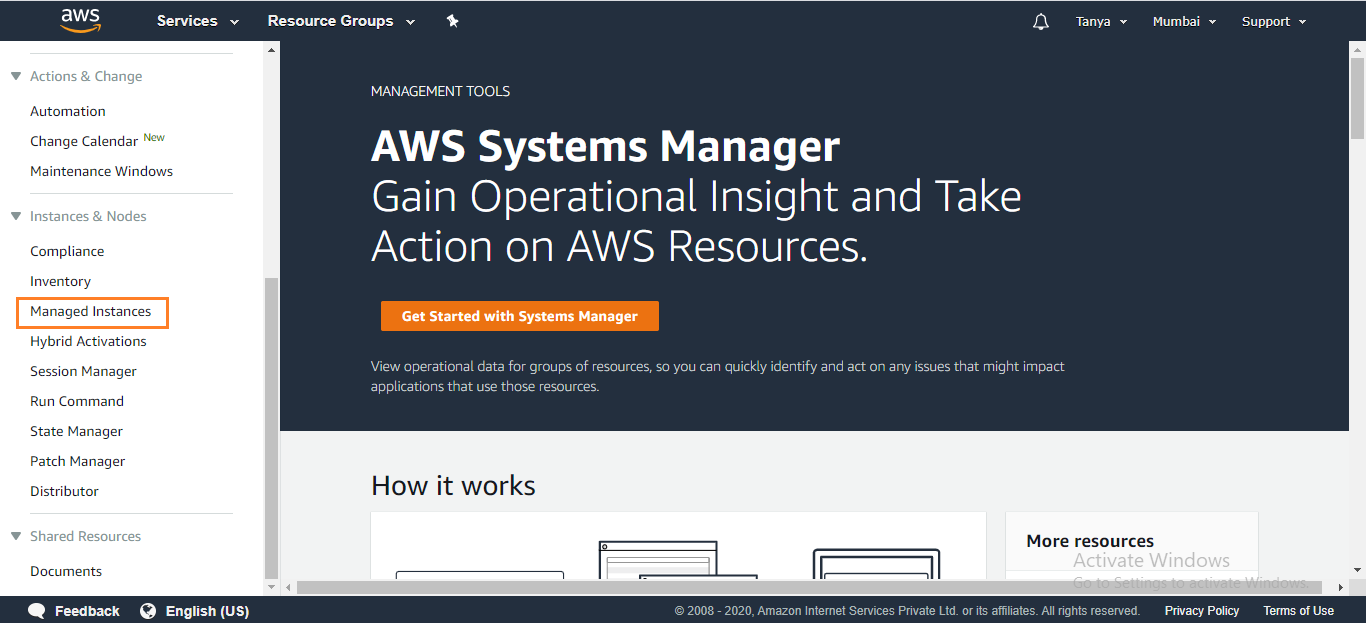
Run System Manager 1.
Open System Manager service on AWS console. On the right side column
under Instances and Nodes click on Managed Instance.
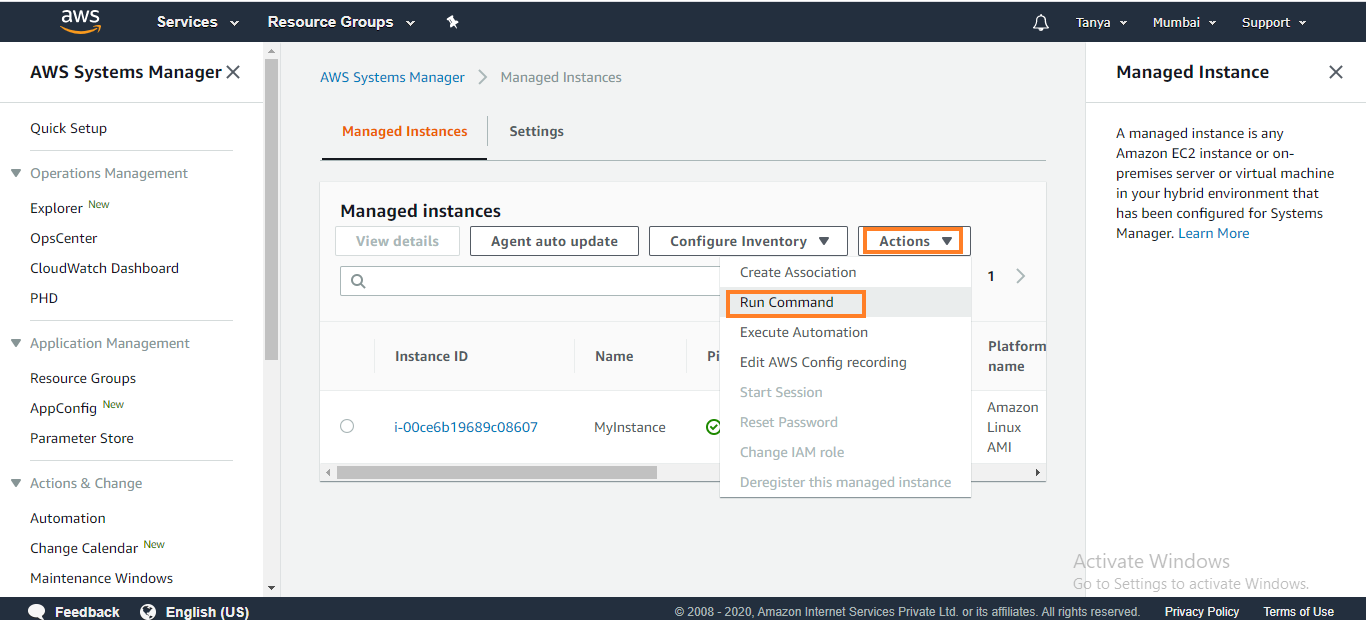
2. On the
Managed instances page, in the Actions drop-down select Run
Command.
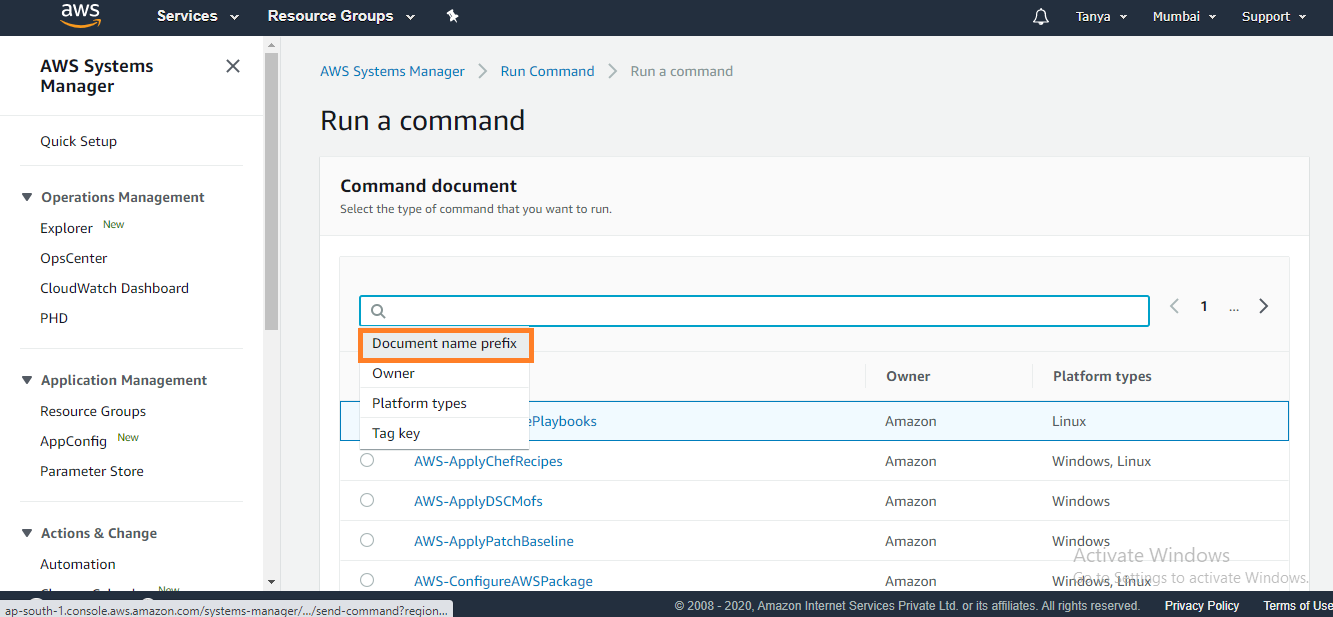
3. On the
Run a command page, click in the search bar and select Document name
prefix, then click on Equal, then type in AWS-UpdateSSMAgent. Now
click the button on the left of AWS-UpdateSSMAgent. This
document upgrades the Systems Management agent on that instance.
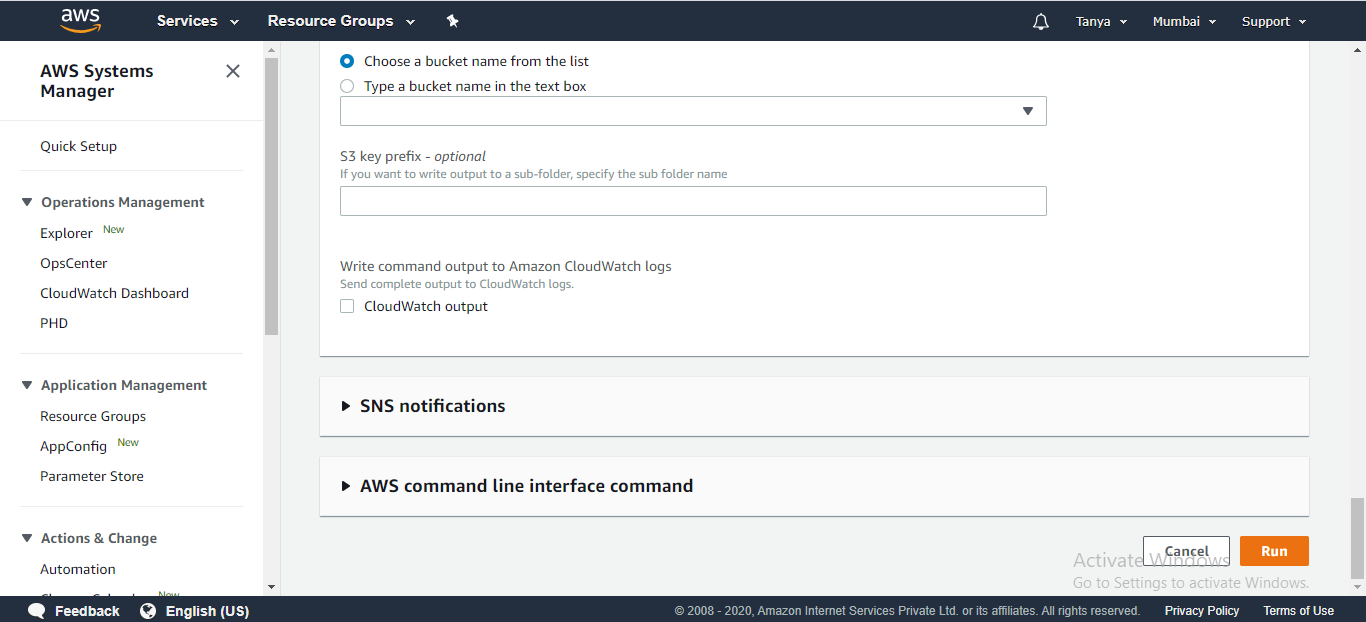
4. Scroll down to the Targets panel and
click the checkbox next to your managed EC2 instance.

5. Scroll down and select Run.
Next, you
will see a page documenting the command that you provided being actively run
and overall success in green.
Use of
the Systems Manager Run Command feature to run scripts or commands on EC2
instances or on-premises servers:
The Systems
Manager Run Command feature allows users to remotely run scripts or commands on
EC2 instances or on-premises servers. This can be useful for tasks such as
applying patches or updates, running diagnostics, or executing custom scripts.
The Run Command feature is accessible through the AWS Management Console, the
AWS CLI, or the Systems Manager API.
To use the
Run Command feature, users must first create an IAM role that grants
permissions to the Systems Manager service. Once the role is created, users can
select the target instances or servers and specify the script or command to be
executed. The Run Command feature also provides options for scheduling commands
to be executed at a later time or on a recurring basis.
One of the
advantages of using the Run Command feature is that it allows users to execute
scripts or commands on multiple instances or servers at the same time, saving
time and effort. It also provides an audit trail of the commands that have been
executed, allowing users to track changes and maintain a record of the actions
taken on their instances or servers.


No comments:
Post a Comment