Steps to
configure an Apache web server
Step
1: Download Apache
1. Go to the
Apache Lounge website to download the latest version of the Apache HTTP Server.
2. Download the binary version suitable for your system (usually found under the “Apache HTTPD” section).
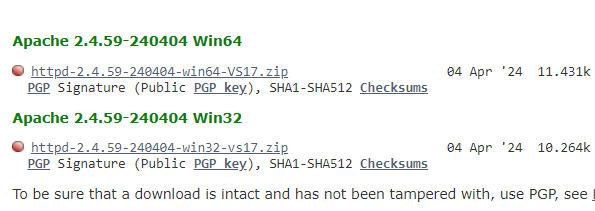
Apache win64 download.
Step 2: Install Apache
Extract the
downloaded zip file to your preferred location (e.g., C:\Apache24).
Step 3: Configure Apache
1. Open the
extracted folder and navigate to the conf directory.
2. Locate
the httpd.conf file(C:\Apache24\conf) and open it with a text editor
(e.g., Notepad).
Important
Configuration Changes
1.ServerRoot: Set
the server root to the directory where Apache is installed.
ServerRoot "C:/Apache24"2.Listen: Set the port number you want
Apache to listen on (default is 80).
Listen 803.ServerName: Specify the server name and
port.
ServerName localhost:804.DocumentRoot: Set the directory where your web
files will be located.
DocumentRoot "C:/Apache24/htdocs"5.Directory: Update the <Directory>
directive to match the DocumentRoot.
<Directory "C:/Apache24/htdocs">
    Options Indexes FollowSymLinks
    AllowOverride None
    Require all granted
</Directory>
Optional
Step: Change Port
and Root Directory
If you want
to change the default port and root directory for serving files, follow these
steps:
1. Change
Port:
- Open httpd.conf and find the
Listen directive.
- Change the port number to the desired value (e.g., 8080).
Listen 8080Update the
ServerName directive to reflect the new port.
ServerName localhost:80802. Change
DocumentRoot:
- Decide on the new directory
where you want to serve your web files (e.g., D:/MyWebFiles).
- Update the DocumentRoot directive.
DocumentRoot "D:/MyWebFiles"- Update the <Directory> directive to match the new DocumentRoot.
<Directory "D:/MyWebFiles">
    Options Indexes FollowSymLinks
    AllowOverride None
    Require all granted
</Directory>
Step 4:
Install Apache as a Windows Service
1.Open
Command Prompt as an administrator.
2.Navigate to the Apache bin directory.
cd C:\Apache24\bin3.Install Apache as a service:
httpd.exe -k installStep 5: Start Apache
1.Start Apache service:
httpd.exe -k startAlternatively,
you can start and manage the Apache service via the Services management
console:
- Open the Run dialog (Win + R),
type services.msc, and press Enter.
- Find “Apache2.4” in the list,
right-click, and select “Start”.
Step 6: Verify Apache Installation
Open a web
browser and navigate to http://localhost. You should see the “It works!”
default Apache page.
Or
open the
command prompt as administrator and type the following command.
httpd -v
Apache version installed verify
Step 7:
Adjust Firewall Settings
Ensure that
the Windows Firewall allows traffic on the port Apache is using (usually port
80).
- Open the Control Panel and go to
System and Security > Windows Firewall > Advanced settings.
- In the left pane, click on
Inbound Rules.
- In the right pane, click on New
Rule.
- Select Port and click Next.
- Select TCP and specify the port
number (80).
- Allow the connection and apply
the rule to the appropriate profiles (Domain, Private, Public).
- Name the rule (e.g., “Apache
HTTP”) and finish the wizard.
Conclusion
You have successfully installed and configured the Apache web server on your Windows machine. You can now place your web files in the htdocs directory and start serving web content. For further customization and advanced configuration, refer to the Apache documentation.


No comments:
Post a Comment