Continuous Integration and Continuous Delivery/Continuous Deployment, the so-called CI/CD, requires an automated pipeline. Whenever some new code is pushed to the repository, the pipeline is triggered and starts to unit test the code, build the image and push the image to a container registry. This is a huge time-saver and a must-have for modern software development.
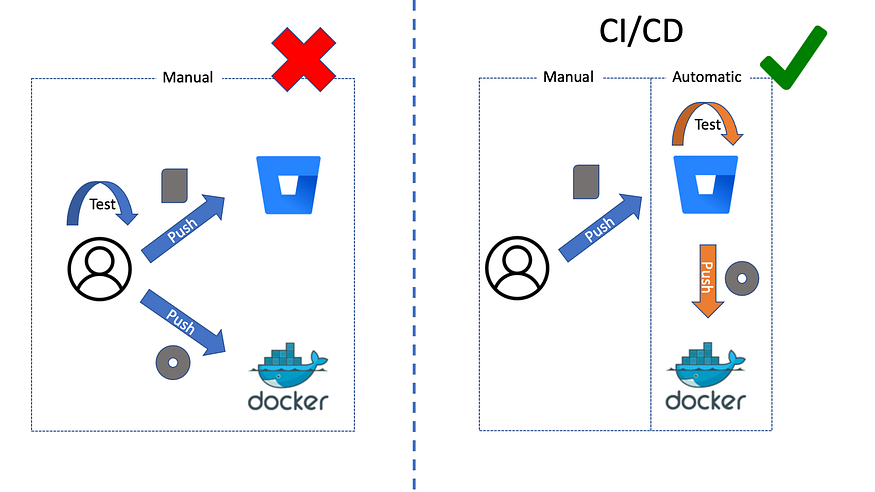
Both GitHub and BitBucket provide us with CI/CD. But when I tried it on BitBucket, I stumbled for an hour before I succeeded. And I am surprised that there was not a single complete walkthrough on the Internet. So I document the steps here for those who want a smooth sailing.
You need one account in BitBucket and one in Docker Hub to complete this tutorial. The free accounts are fine. The code for this project is hosted in BitBucket.
1. Create a simple test-driven development Python project
First, create a BitBucket repository. Then we need a barebone test-driven development (TDD) Python project as our code base. Create, commit and push these four files to the repository: test_app.py, app.py, requirement.txt and Dockerfile. Their contents are as follows:
test_app.py is our unit test file. It can test a posteriori whether the finished main code can return the correct answers in different test cases. We can also look at it from a different angle: the test cases are a priori objectives that we want to complete one by one with our main code. From this angle, we should first write test_app.py before we code app.py. And the code development becomes a target shooting practice. This is also what TDD is all about.
We’d better test our code locally before we commit and push the code to BitBucket. But it is possible to enforce the automatic unit test on BitBucket so that only valid modifications are accepted into the repository. And this is also what we are going to set up in the next step.
2. Set up the BitBucket Pipeline
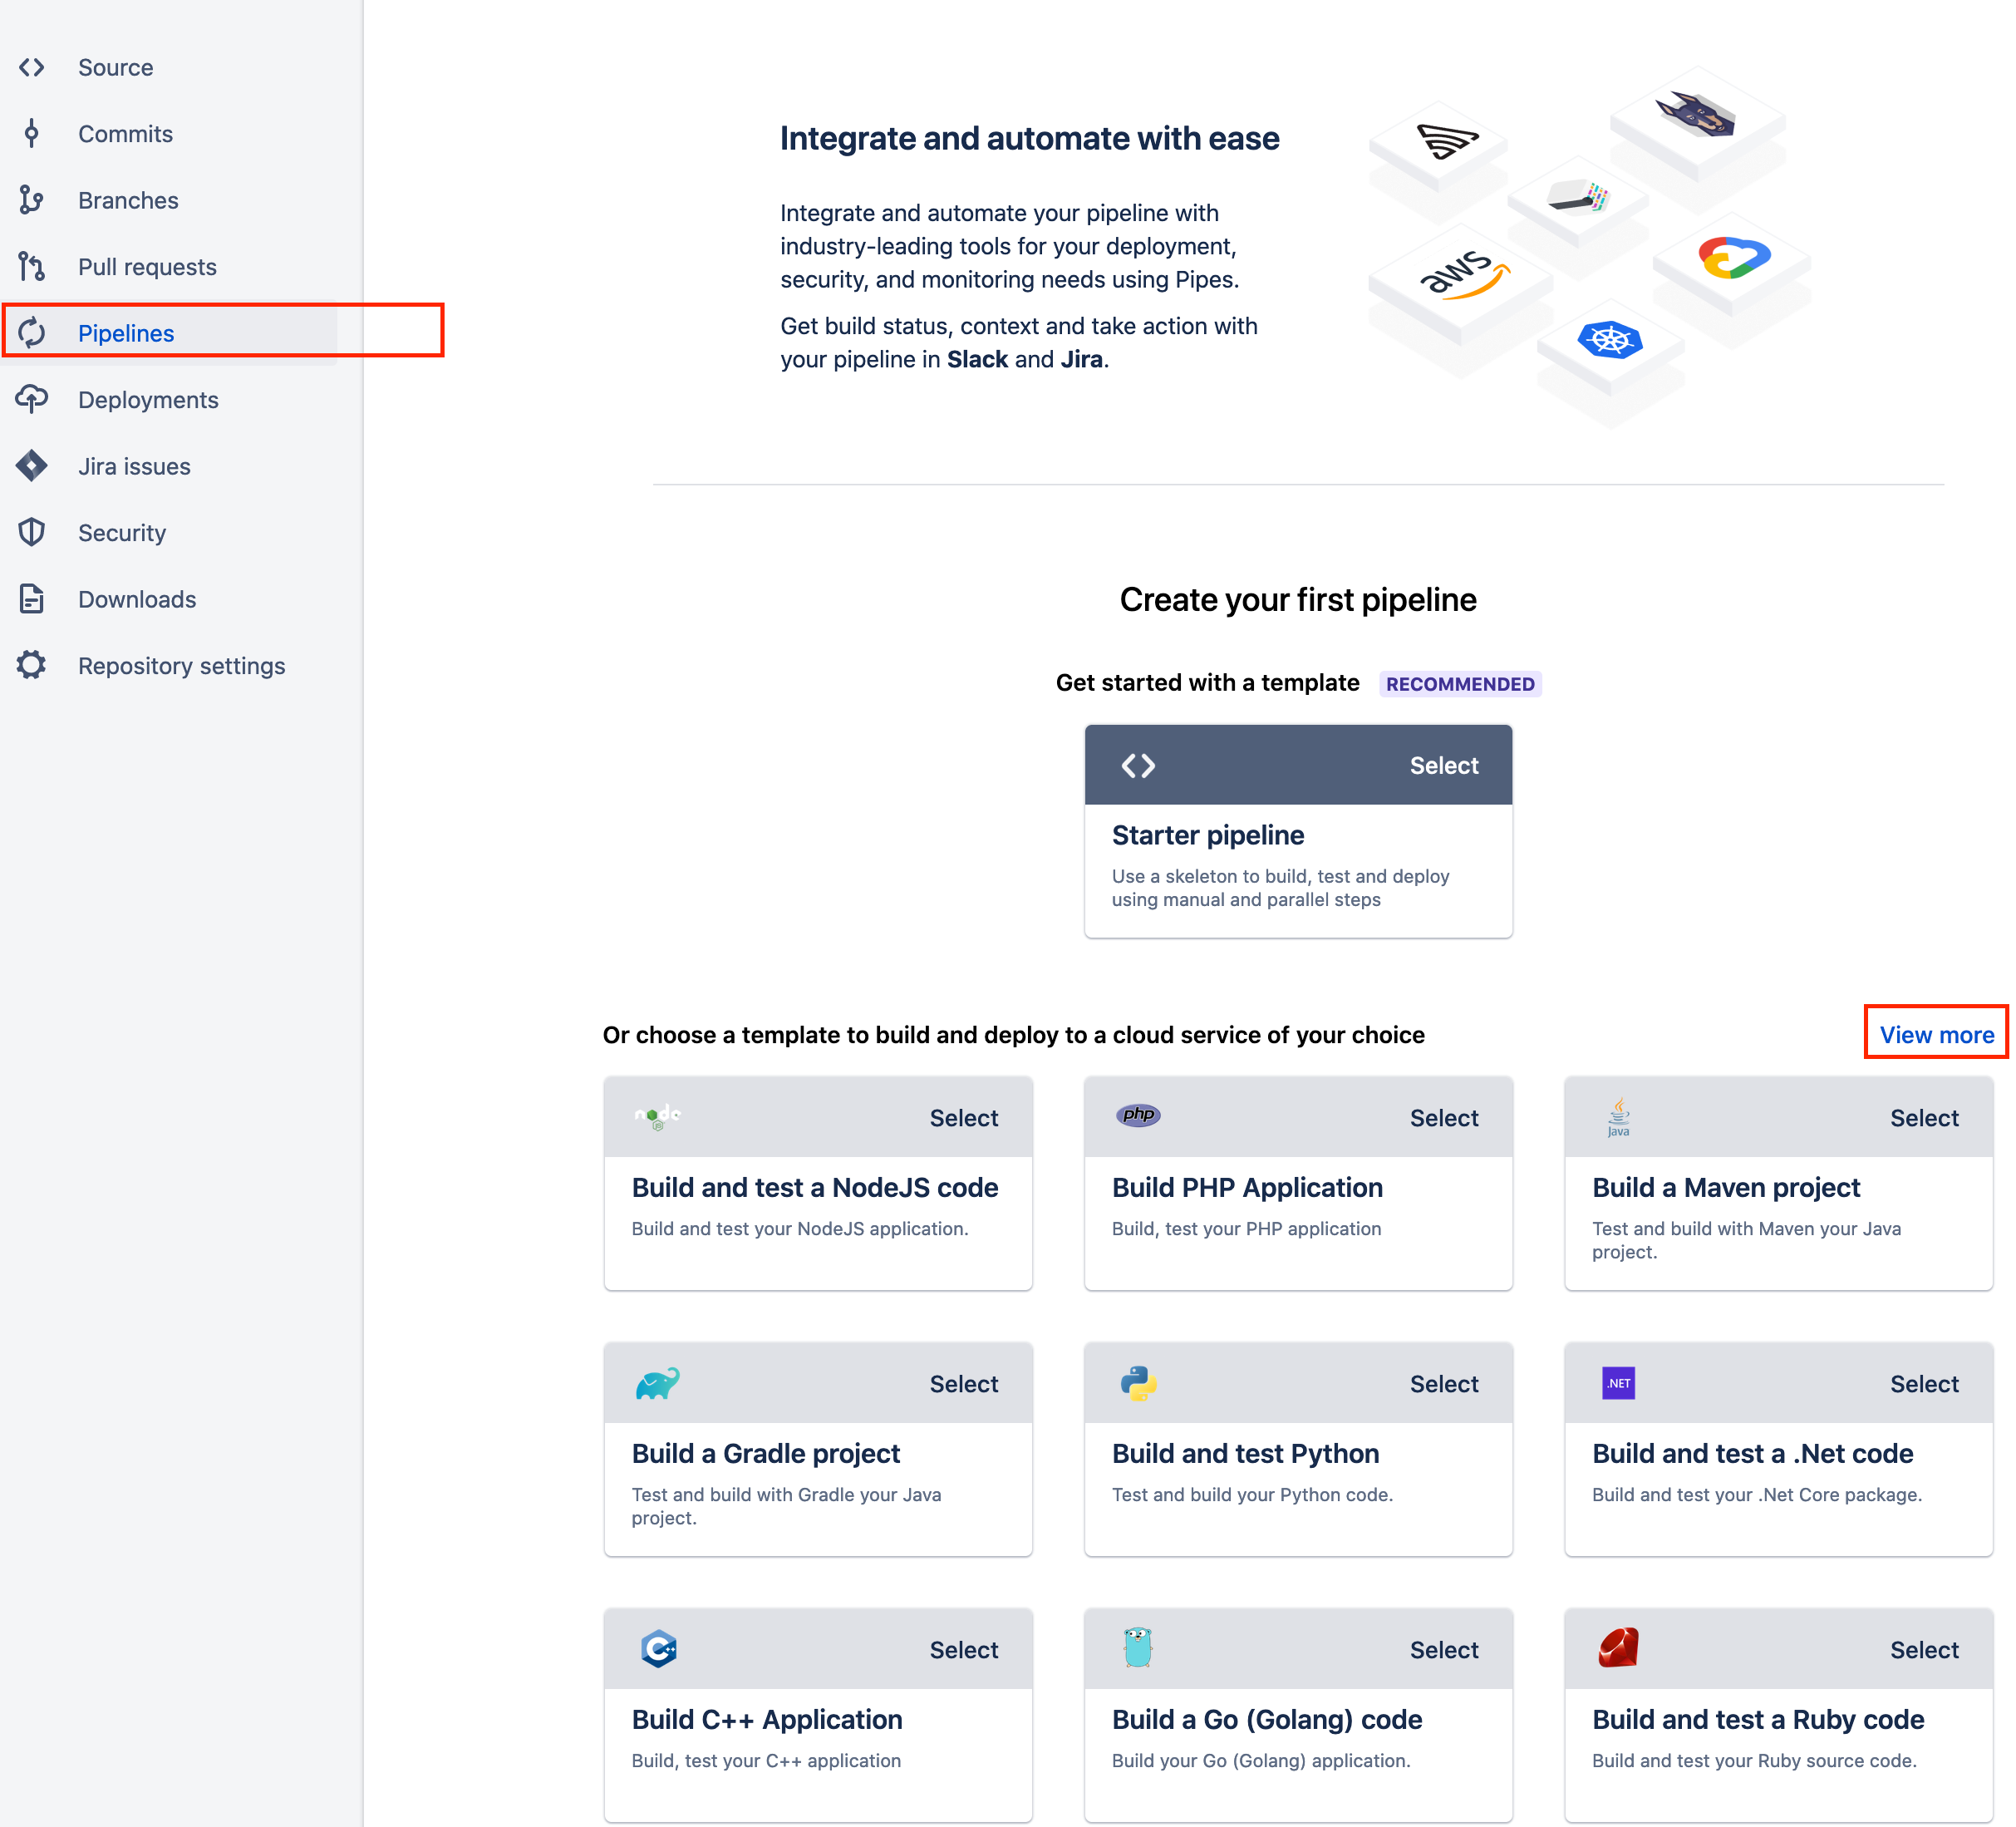
We can now configure BitBucket. Visit the BitBucket repository in your browser. In the new repository console, click Pipeline and View more in Or choose a template to build and deploy to a cloud service of your choice. Select Publish a docker image (Figure 2):
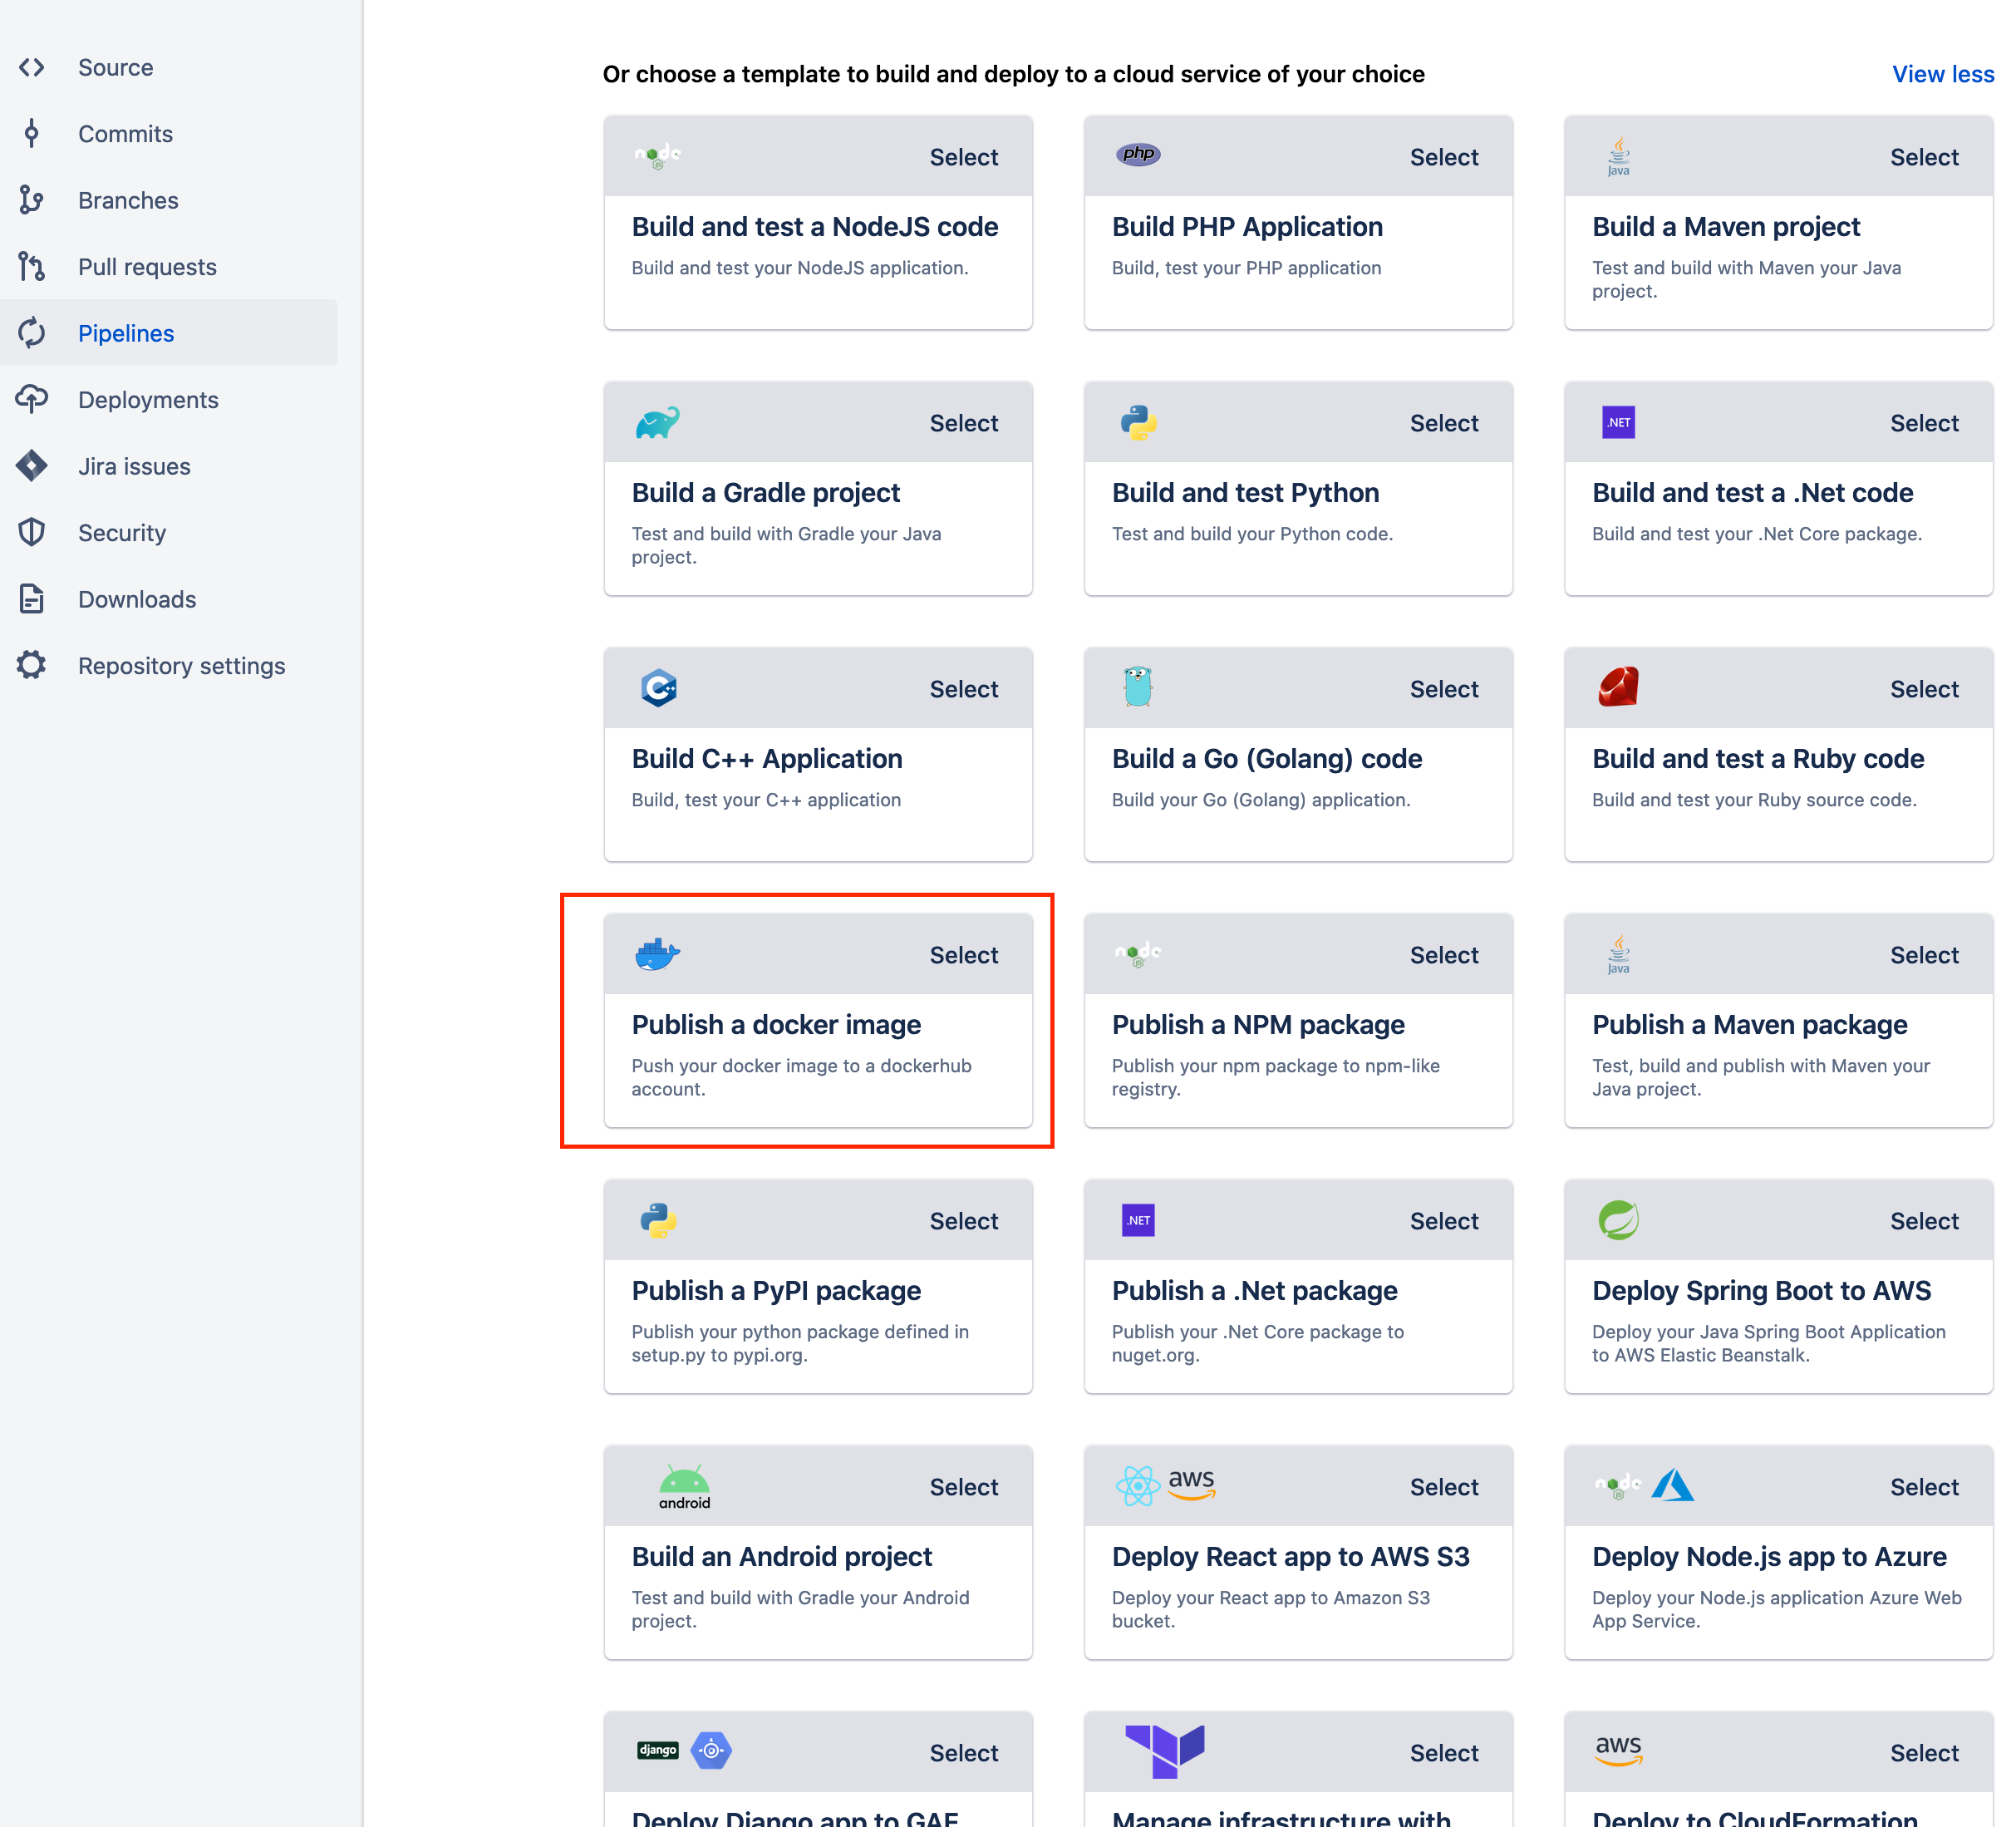
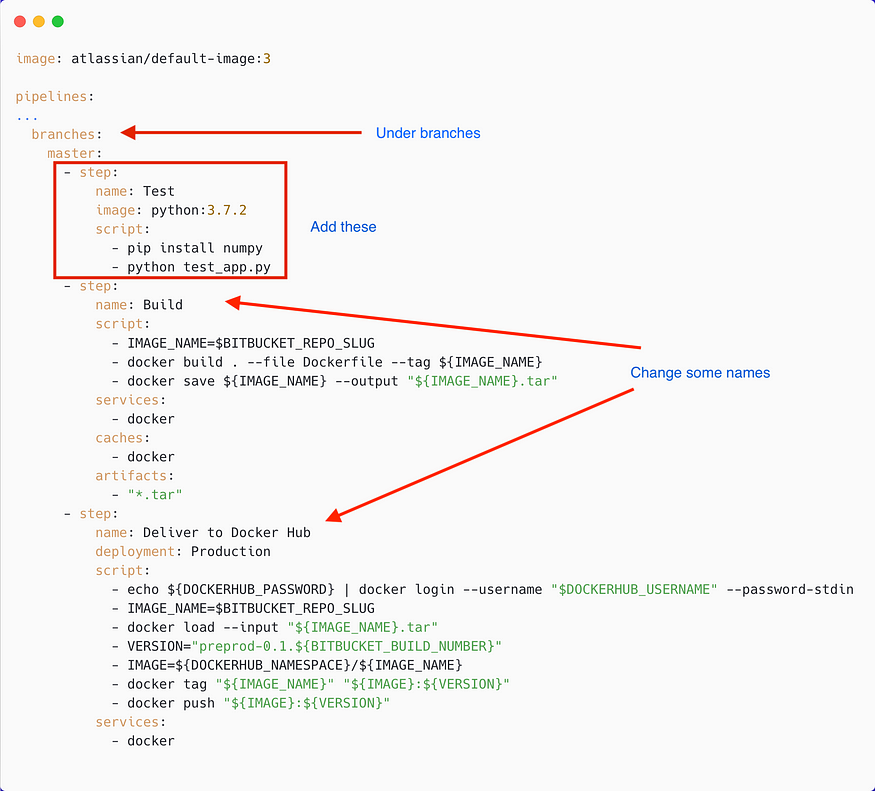
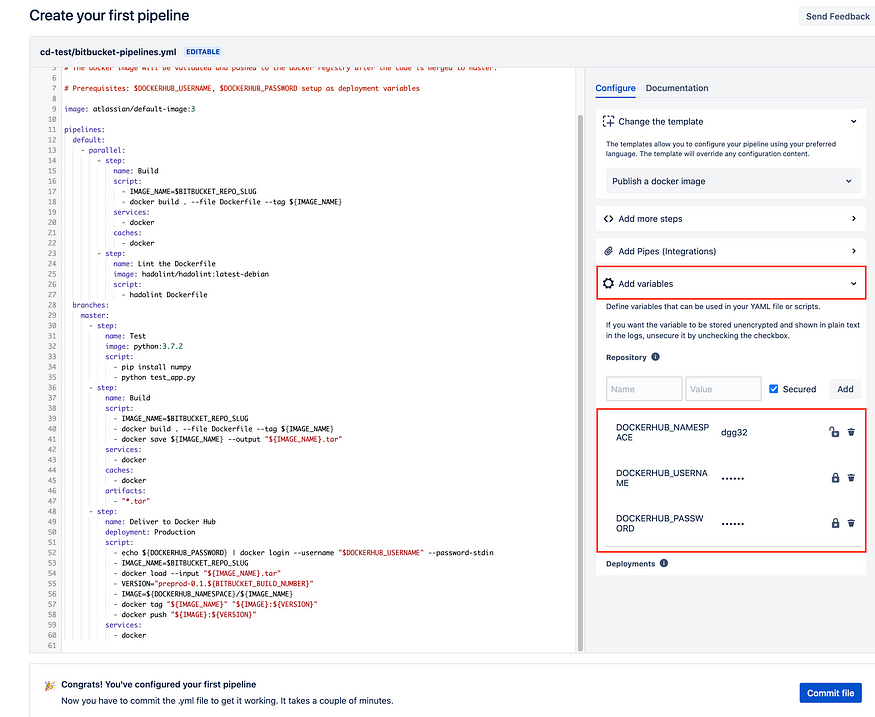
BitBucket will create a prefilled bitbucket-pipelines.yml file for you. We need to add a step under its master branch to enforce the unit test though. In addition, you can also make some edits in some of the names. The branches in my bitbucket-pipelines.yml looks like this:
Here comes a pitfall. The documentation within the prefilled bitbucket-pipelines.yml states that we only need two deployment variables: DOCKERHUB_USERNAME and DOCKERHUB_PASSWORD. That is not completely accurate because the delivery will fail without the variable DOCKERHUB_NAMESPACE. Also, a wrong DOCKERHUB_NAMESPACE value will result in a “denied: requested access to the resource is denied” error during the push. For me, the DOCKERHUB_NAMESPACE is also my Docker Hub user name, so it has the same value as DOCKERHUB_USERNAME. To set these variables, add three key-value pairs in the Add variables panel. The keys are DOCKERHUB_NAMESPACE, DOCKERHUB_USERNAME and DOCKERHUB_PASSWORD. Make sure Secured is checked when you enter the credentials (Figure 4).
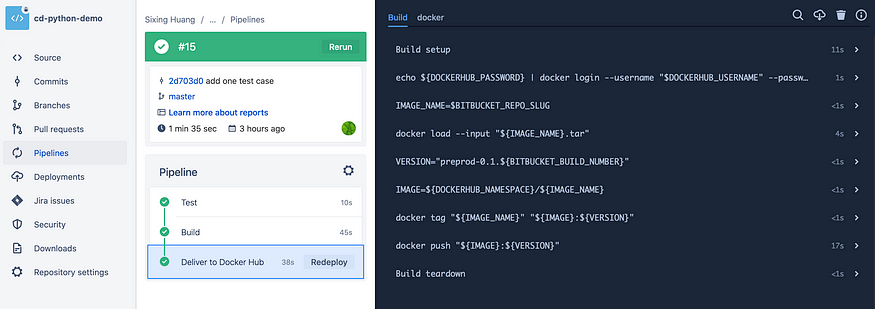
Once you click the Commit file button, BitBucket will immediately kick off the first run. If everything runs smoothly, you should see green check marks next to our three steps in the Pipeline panel (Figure 5):
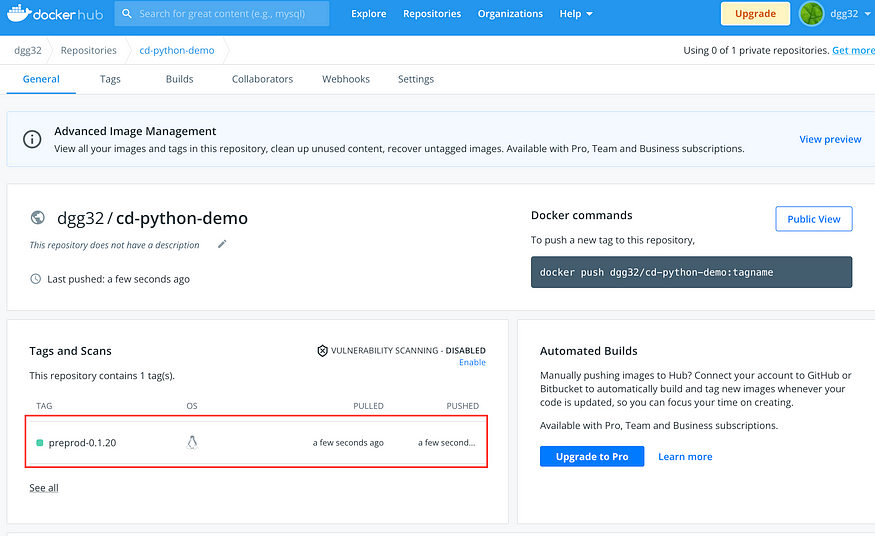
Go to your Docker Hub. Bitbucket will create the image repository for you if it does not exist and then push the new image inside (Figure 6. You can see from my version number that I have done some experiments 😉).
You can deploy the image in your local computer, too.
Conclusion
Congratulations! Whenever you push your new code to the BitBucket repository, the Pipeline will unit test the code, build a new image and push it to your Docker Hub. So BitBucket just takes over the repetitive stuffs and frees you from the manual labor. From now on, you are encouraged to write and commit more quality code.
You can play with the pipeline a bit. For example, you can change your Python script to fail the unit test deliberately. You will see that the pipeline stops at the Test step. And BitBucket will send you an email alert about the failure. You can try another programming language, or push the image to your private image registery. Since this tutorial does not demonstrate continuous deployment, you could implement it as your homework, too.


No comments:
Post a Comment