Continuous Integration and Continuous Delivery (CI/CD) has become essential for software development teams, allowing them to create and deploy applications more quickly and efficiently. Bitbucket Pipelines is a popular CI/CD tool that allows developers to automate their build, test, and deployment processes quickly and easily. It is integrated into Bitbucket Cloud, a popular code repository management solution. You can automate your CI/CD pipeline with Bitbucket Pipelines, making it faster, more efficient, and less error-prone. In this article, we will look at how to use Bitbucket Pipelines to create a fast CI/CD pipeline.
So, let's see first how to set up bitbucket pipelines.

How to Set Up Bitbucket Pipelines?
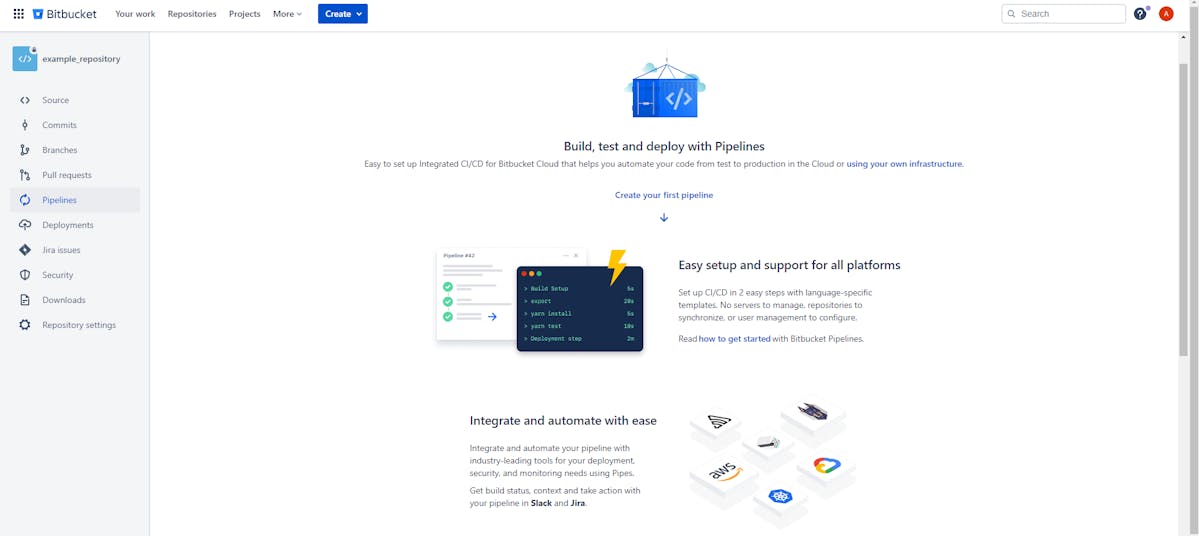
The first step in building a fast CI/CD pipeline with Bitbucket Pipelines is to set it up. Bitbucket Pipelines is a feature that is available in Bitbucket Cloud. To set up Bitbucket Pipelines, follow these steps:
Step 1: The first step is to set up your Bitbucket repository. If you don't have a Bitbucket account, you will need to create one.
Step 2: Go to the repository where you want to set up pipelines
Step 3: Click on "Settings" on the left-hand side menu
Step 4: Click on "Pipelines" and then click on "Enable Pipelines"
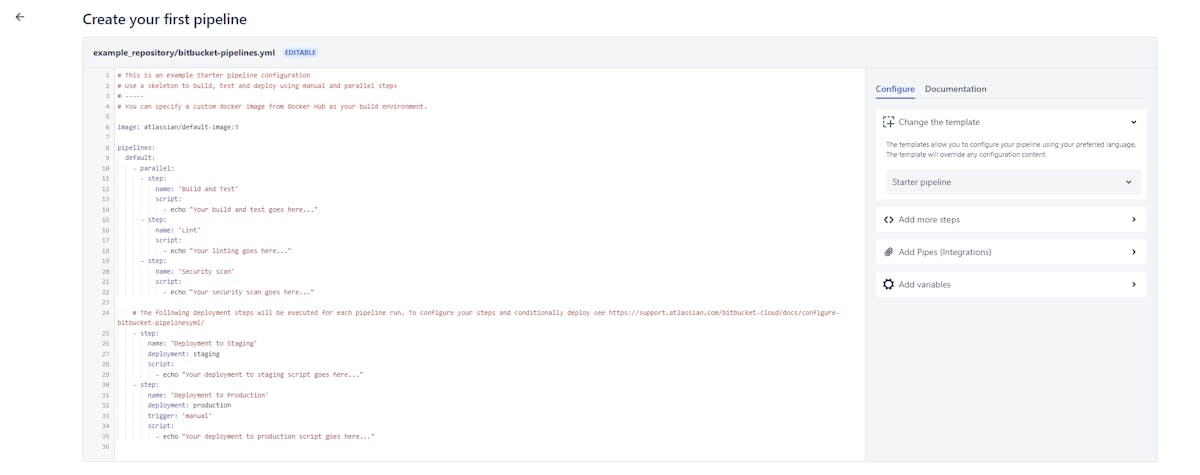
Step 5: Once Pipelines are enabled, create a new file called "bitbucket-pipelines.yml" in the root of your repository. This file is used to define your build, test, and deployment processes.
Step 6: Once you have added the bitbucket-pipelines.yml file, you can define your pipeline. Here is an example pipeline:
Step 7: You can run your pipeline after you've defined it by pushing your code to your Bitbucket repository. When you push your code, Bitbucket Pipelines will run your pipeline, building, testing, and deploying your code according to the settings in your bitbucket-pipelines.yml file.

- You can run your pipeline after you've defined it by pushing your code to your Bitbucket repository. When you push your code, Bitbucket Pipelines will run your pipeline, building, testing, and deploying your code according to the settings in your bitbucket-pipelines.yml file.
How to Create Fast CI/CD Pipelines with Bitbucket?
Now that we know everything about Bitbucket Pipeline, building a faster CI/CD pipeline with Bitbucket involves strategic steps and optimizations to streamline your software development process.
Let's see how to create a smooth CI/CD pipeline with Bitbucket.
1. Use Caching to Save Build Time
One way to speed up your pipeline is to use caching. Caching can save build minutes in Bitbucket Pipelines. When you run a build, dependencies are downloaded and installed. If you run the build again, the dependencies are downloaded and installed again, even if they have not changed. Caching can save time by storing the dependencies that are downloaded and installed, so they do not have to be downloaded and installed again.
Here is an example pipeline that uses caching:
pipelines:
  default:
    - step:
        name: Build and Test
        caches:
          - node
        script:
          - npm install
          - npm test
In this example pipeline, caching is enabled by adding the "caches" section to the step. The "node" cache is used to cache the dependencies installed by npm. When the pipeline is run again, the dependencies are loaded from the cache, which saves time.
2. Use Parallelism to Speedup Testing
Parallelism is a feature of Bitbucket Pipelines that allows developers to speed up testing and improve the overall efficiency of their CI/CD process. Parallelism refers to the ability to divide a single job into multiple smaller jobs that can run concurrently on different machines, reducing overall execution time.
Bitbucket Pipelines runs each job sequentially, one after the other, by default. However, by using parallelism, you can run multiple jobs in parallel, significantly speeding up your testing process.
To use parallelism in Bitbucket Pipelines, your pipeline steps must be defined in a way that allows for parallel execution. For example, in your pipeline configuration file, you can define multiple test scripts and then run them in parallel using the parallel keyword.
The parallel steps you configure will start at the same time in our auto-scaling build cluster and will finish before the next serial step runs. It is primarily intended for large suites of automated tests, but it can also be used for large parallelizable computing tasks.
Running steps in parallel provide faster feedback. This saves developers valuable time that would otherwise be spent waiting for the build.
3. Scheduled pipelines
Bitbucket Pipelines is an excellent solution for developers who require immediate feedback when changes are committed. It's a simple continuous integration and delivery (CI/CD) solution for automating the build, test, and deployment processes.
However, there are many situations in which builds must be run on a regular basis, even if the code base has not changed. For example, longer-running nightly builds, daily or weekly deployments to a test environment, data validation and backups, load tests, and tracking performance over time. Furthermore, there are jobs and tasks that are unrelated to code changes but must be completed on a regular basis.

Defining a schedule in Bitbucket Pipelines is a straightforward process.
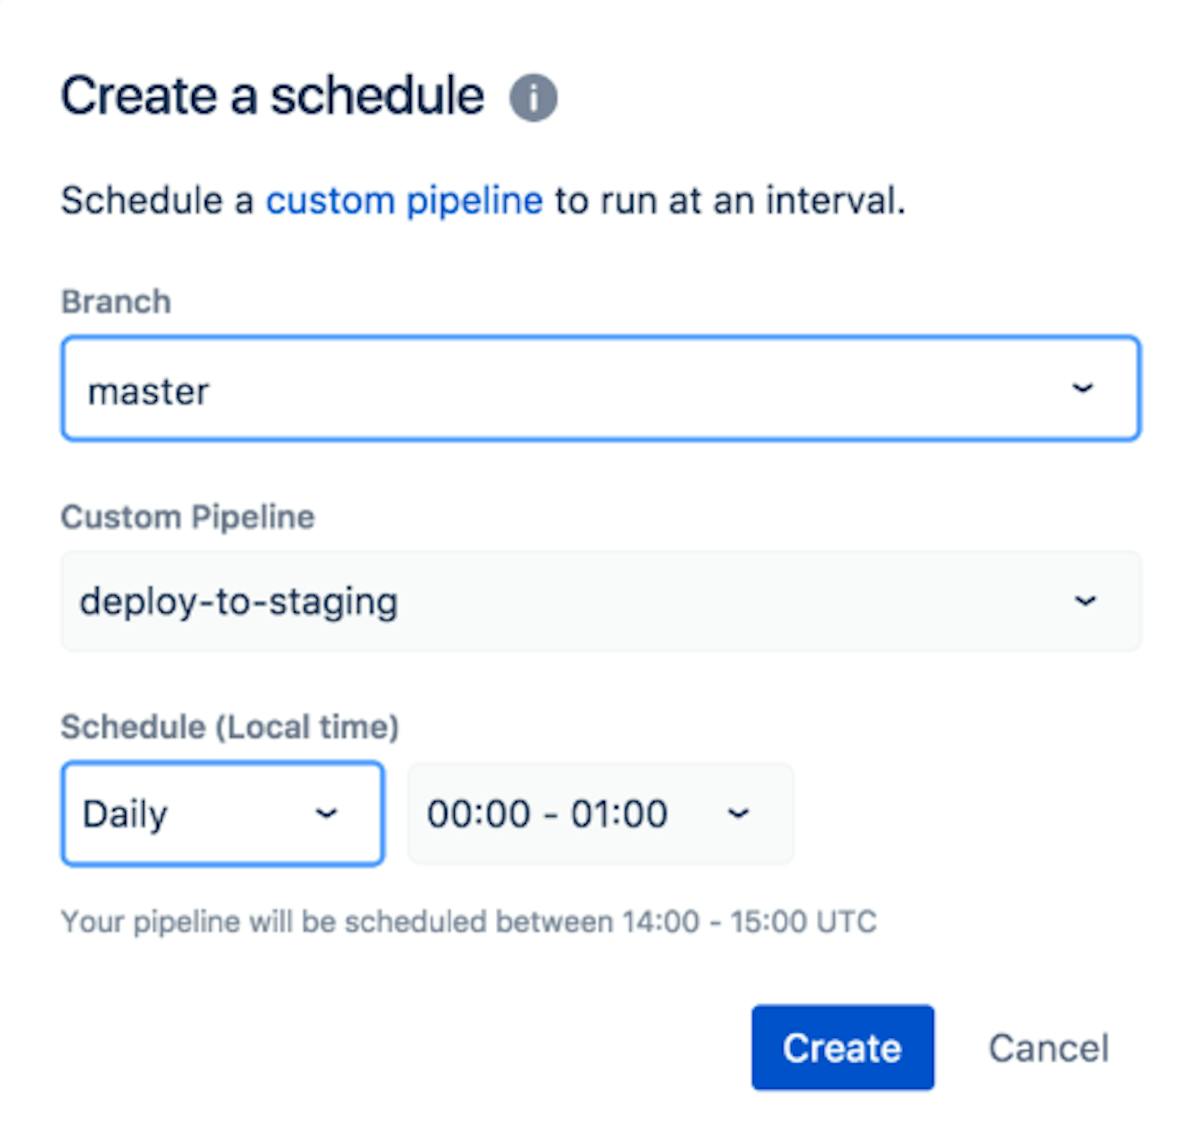
Follow these steps to create a pipeline schedule in Bitbucket Pipelines:
- Navigate to your Bitbucket repository.
- Click the "Pipelines" tab, then "Schedules" at the top right of the page, and then "New schedule"
- Select the branch and pipeline to be scheduled. The scheduled run will use the selected branch's HEAD commit.
- Check that the pipeline is defined in the bitbucket-pipelines.yml file on the branch you've chosen.
- Finally, configure the schedule to specify when the pipeline should run.
4. Monitor and Optimize Your Pipeline
Once your pipeline is operational, it must be monitored and optimized. Bitbucket Pipelines provides detailed logs and metrics to aid in pipeline monitoring. These logs and metrics can be used to identify bottlenecks in your pipeline and optimize it for speed and efficiency.
Using a third-party tool like Pipeline Viewer is one option. Pipeline Viewer depicts your pipeline visually, making it easier to identify bottlenecks and optimize your pipeline.
The Bitbucket Pipelines insights feature is another way to optimize your pipeline. The insights feature provides detailed pipeline metrics such as build times, success rates, and failure rates. It is possible to identify areas for improvement based on these metrics.
Accelerate CI/CD Pipeline with Bitbucket
Finally, Bitbucket Pipelines is a powerful and adaptable tool for creating fast CI/CD pipelines. You can optimize your pipeline with features like caching, scheduling, and parallelism to deliver fast feedback and improve your development process.
You can use Bitbucket Pipelines to build a robust and efficient CI/CD pipeline by leveraging the best practices and tips discussed in this article. Bitbucket Pipelines has everything you need to automate your workflows and achieve your development goals, whether you're deploying to production, running tests, or performing data validation.
Keep experimenting and iterating on their pipeline. Your pipeline may need to be modified as your codebase grows and evolves to accommodate new requirements or optimize performance. By continuously reviewing and refining your pipeline, you can ensure that it remains a reliable and efficient tool for your team.
To make the most of Bitbucket, an engineering analytics tool is the need of the hour. Hatica offers metrics across 13 dashboards, powered by CI/CD tools, Jira, Asana and GitHub.


No comments:
Post a Comment