This guide gets you started with creating a new project in CircleCI.
Prerequisites
A CircleCI account connected to your code. You can sign up for free.
A code repository you want to build on CircleCI.
Build a new project on CircleCI
The authorization method used to set up your CircleCI account determines the definition of "project" in CircleCI, as well as the permissions management processes available to you:
If you authenticated using GitHub OAuth app, or Bitbucket, a "project" in CircleCI maps directly to a "repository" in GitHub. Follow steps to Set up a project below.
If you authenticated through GitLab or the CircleCI GitHub App, a "project" within CircleCI is a standalone entity that you create and then associate with a code repository. Follow steps to Create a project below.
Set up a project
| If you authenticated CircleCI with either the GitHub OAuth app, or Bitbucket, the steps in this section apply to you. |
Follow these steps to set up a new project in CircleCI:
In the CircleCI web app, click Projects in the sidebar.
Find your project in the list and click the blue Set Up Project button next to it.
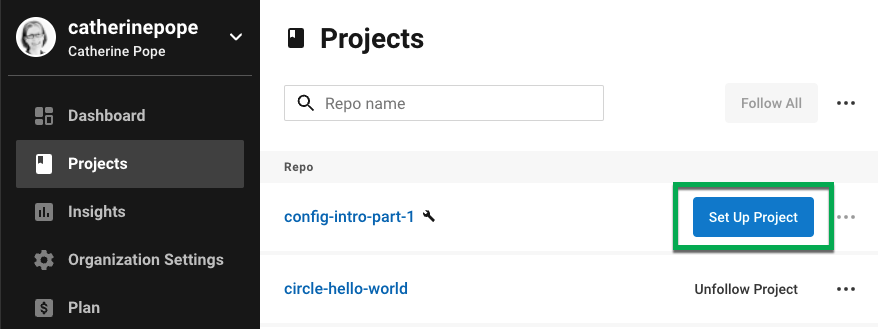
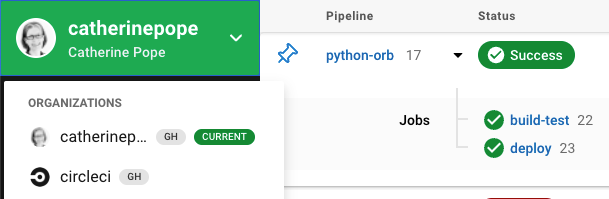
If you cannot see your project, check you have selected the correct organization in the top left-hand corner of CircleCI.
Once you have set up your project, you will be prompted to provide a
config.ymlfile.From the pop-up window, select your preferred option. You can either:
Include a
config.ymlin the.circlecidirectory of your repository.Commit a starter CI pipeline to a new branch of your repository.
Use an editable
config.ymltemplate.If you choose the starter CI pipeline, a sample
config.ymlfile is created and committed to acircleci-project-setupbranch in your repository.For guidance on creating a
config.ymlfile, see Configuration Introduction.
Click the blue Set Up Project button.
CircleCI uses the specified .circleci/config.yml file to run your pipeline. You can see the output in the CircleCI dashboard.
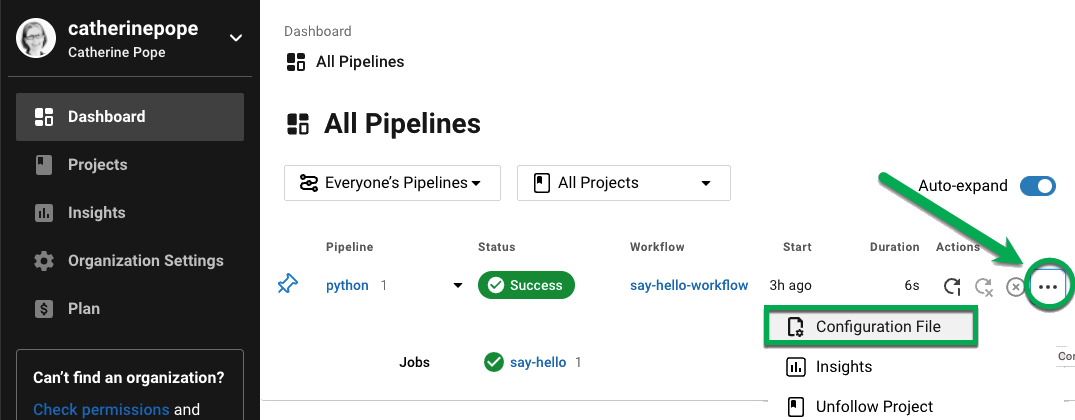
To make changes to your pipeline, either edit the .circleci/config.yml file in your repository, or click the ellipsis next your project in the Dashboard and choose Configuration File. This opens the CircleCI configuration editor, from where you can edit and commit your config.yml file.
Create a project
If you authorized CircleCI with either GitLab, or the GitHub App, follow the steps in the section below that applies to you.
GitHub App project
Follow these steps to create a new project in CircleCI:
In the CircleCI web app, click Projects in the sidebar.
Click at the top of the page.

In the Connect Code window, click the GitHub tile.
In the Create New Project window, use the options to:
Input your project name in the Project Name field.
Tell CircleCI where your code is stored.
Click at the bottom of the window. CircleCI will now automatically generate a custom configuration file based on the programming languages and frameworks detected in your selected repository.
When the custom configuration file has been generated, click to commit your custom configuration file on a new branch called
circleci-project-setup. Alternatively, click to view the custom configuration file in the configuration editor.If CircleCI is unable to generate a custom configuration file, CircleCI will generate a fallback template that you can utilize to create your
config.ymlfile.
GitLab project
Follow these steps to create a new project in CircleCI:
In the CircleCI web app, click Projects in the sidebar.
Click at the top of the page.
In the Connect Code window, click the GitLab tile.
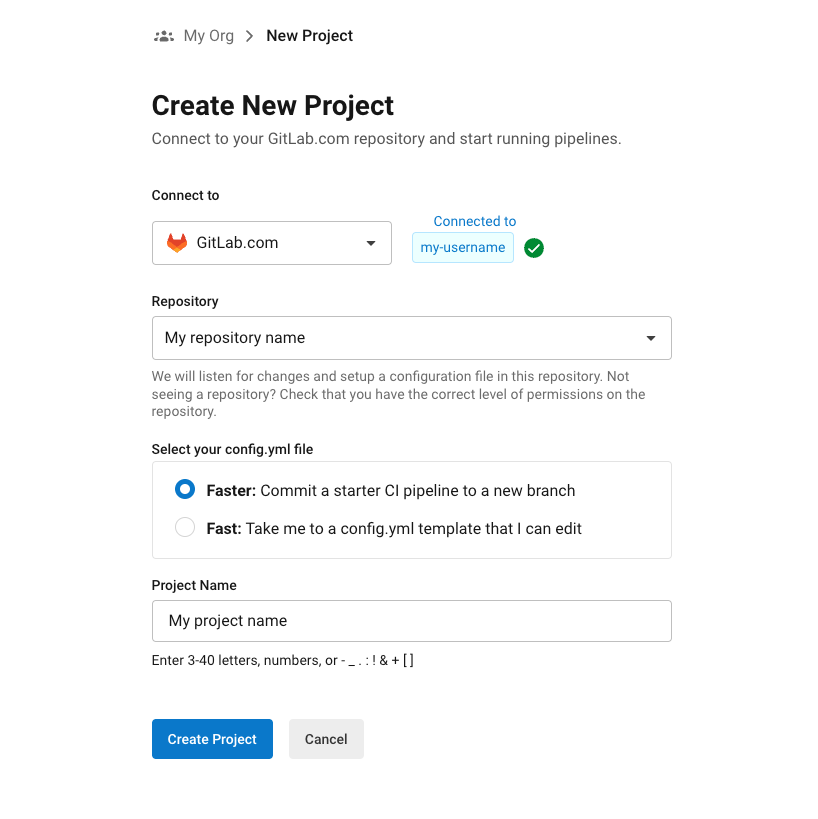
In the Create New Project window, use the options to:
Tell CircleCI where your code is stored
Choose an option for managing your
.circleci/config.ymlfile. You can either choose to let CircleCI pick a configuration file for you, and commit this to a new branch in you repository, or you can edit a starter config file in the CircleCI web app and commit that to your repository yourself.For guidance on creating a
config.ymlfile, see the following pages:
The Project Name field is automatically populated with the name of your repository, but you can change this if required.
Click Create Project at the bottom of the window.
CircleCI uses the specified .circleci/config.yml file to run your pipeline. You can see the output in the CircleCI dashboard.
To make changes to your pipeline, edit the .circleci/config.yml file in your repository.


No comments:
Post a Comment