Setup Amazon ECR and push docker image to ECR — Deploy to AWS ECS Fargate with Load Balancer (Part 2)
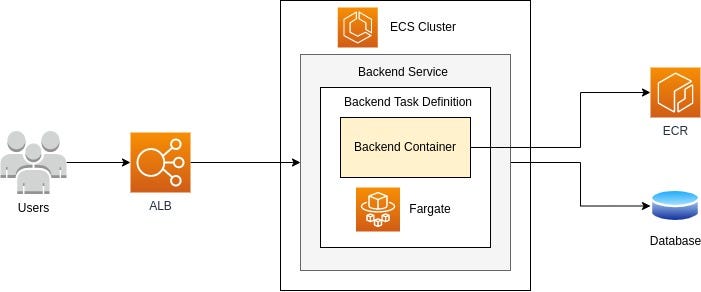
In this part, I will be covering setting up AWS ECR and push the backend server’s docker image to ECR.
Setup AWS Elastic Container Registry (ECR)
Docker has made the life of software engineers and DevOps engineers easier. Running a container anywhere besides development environment requires few steps i.e. push right version of docker image to docker registry. It also has been one of the first steps for deployment process. There are multiple container registry services like docker hub, Amazon Elastic Container Registry (ECR). Docker hub provide only one private repository for free to docker hub user account(not usable for organization) so Amazon ECR can be easier and best option.
Let’s get started with Amazon ECR.
Instructions:
- Login to AWS console and search for ECR and select Elastic Container Registry.
- Click on Create Repository.
- Select Visibility Setting for the repository and enter name of container registry. You can also enable tag immutability if you need.
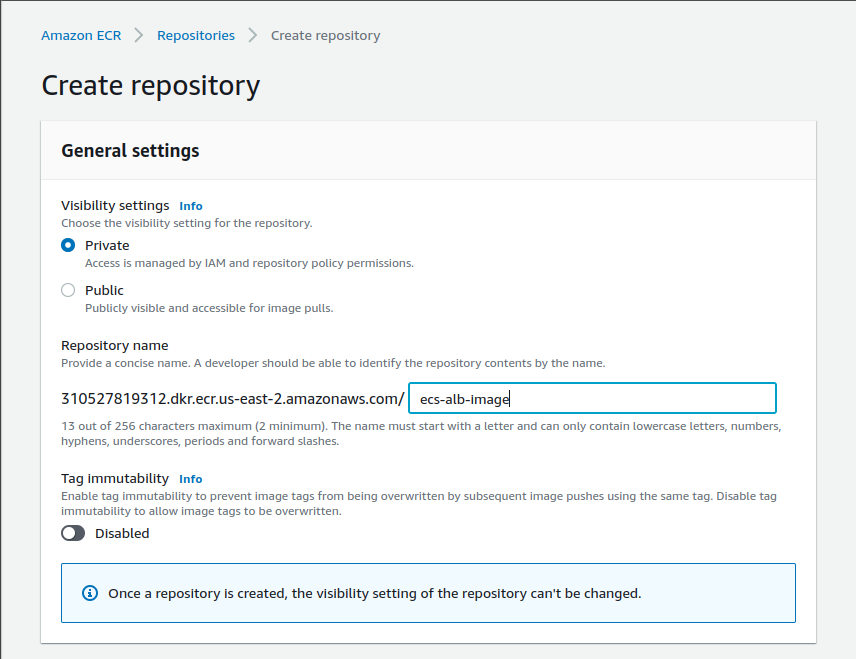
4. In case you require image scan on each image push you can enable it. However, it is now deprecated. Similarly, you can enable KMS encryption if required.
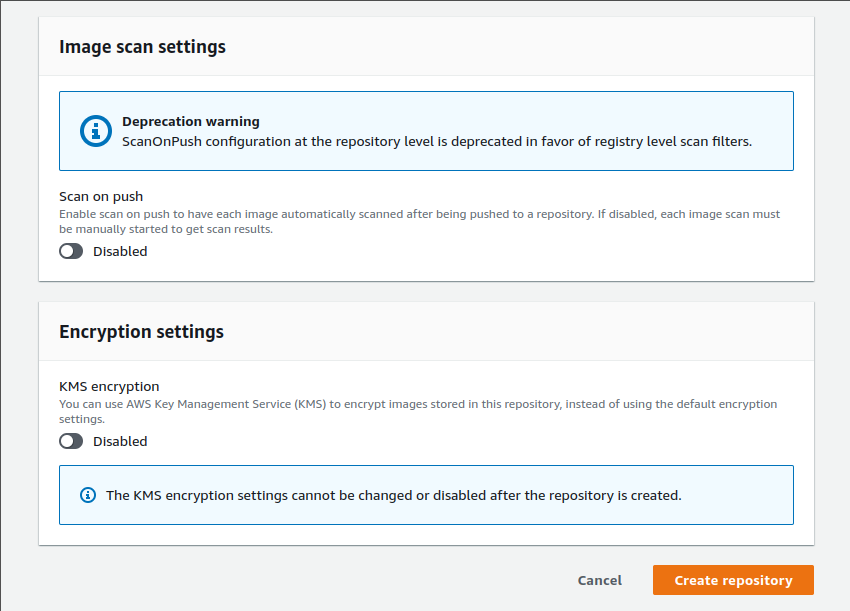
5. Click on Create repository button and we are done with settings.
You have your ECR repository ready.

Push Backend Image to ECR repository
In order to push docker image to the repository, firstly we need aws cli installed and configured.
- Install AWS CLI and Configure aws:
i. Download and install aws cli version 2
ii. Configure aws and Add Access Key ID, Secret Access Key, Region Name and output format. Refer to this.
~ aws configure2. Navigate to Amazon ECR Repositories page in aws console and click your repository.
3. Click on View push commands. There you will see few steps to follow to initially push your image to repository.
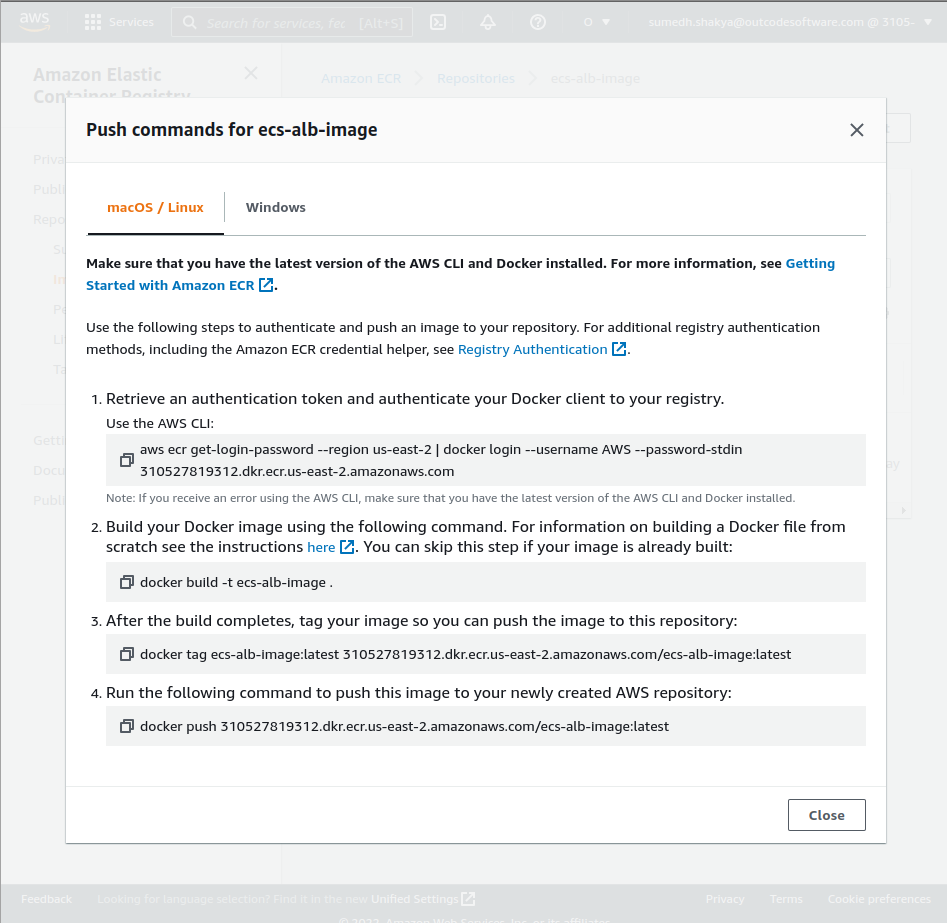
Note: I, being Linux user, will be following according to macOS/Linux tab. Please go to the OS tabs based on your OS and follow the steps.
a. Copy and run command from Step 1 from the pop-up and paste in your terminal. This step will log you into docker registry.

b. Copy and run command from Step 2 to build your Docker image. In case you have already built your image you can skip this step. (I assume you have built an image while following through Part 1)
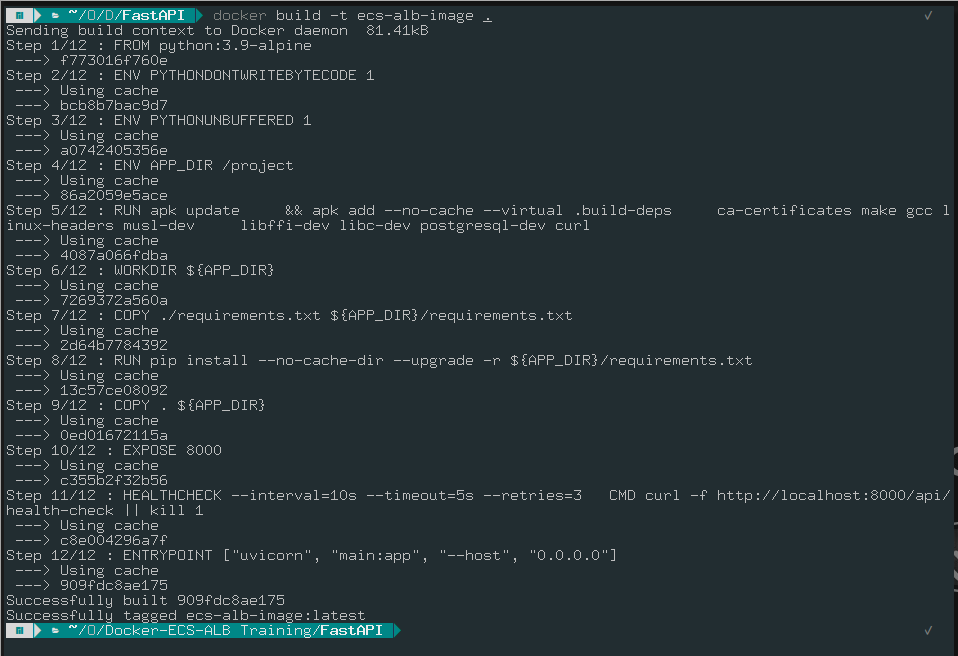
c. After the build completes, copy and run command from Step 3 to tag your image so that you can push image to ECR repository.

d. Lastly, copy and run command from Step 4 to push the image to ECR repository.

4. Confirm your first push.

After first push, if you have to push your new image again to the repository, follow last 3 steps or click on View push commands and follow them.
Hurray! You have now successfully setup your Amazon ECR repository and push your backend docker image to it. Now we are going to create ECS set up here in Part 3

No comments:
Post a Comment